
Planning Your Backpacking Trip

The better you plan your trip, the more likely you are to have an enjoyable experience in the wilderness. Jerry's article How To Do A Section Hike is a brief introduction into planning. We strongly recommend you read through this entire section in addition to his article.
Here are the things we consider when going on one of our adventures:
1. Where To Go & Logistics
2. Meal Planning and Bear Bags
3. Unexpected Weather
4. Route Planning & Park Rules
5. Safety, Maps, Technology
6. Water Treatment
7. Total Carrying Weight of your Backpack

Where to Go
If you weren't excited during the acquiring of gear, it's now time to be get excited. You are searching for a place to enjoy your first trip in the wilderness. This is perhaps an anxious time as well. Like with most things in life, planning will help to alleviate your anxiety.
There are really three ways to approach a multi-day hiking trip with at least one night camping in the woods.
1. Out and Back. Hike to a campsite. Return the next day in the reverse direction on the same trail.
2. Round Robin. Find a loop hike with a campsite somewhere along the route.
3. Point to Point. This can be a logistical challenge. We do this a few times a year when we hike a section of the Appalachian Trail (AT).
As for exactly where you are going, this is easier than you might think. If you don't want to have to deal with reservations, then simply enter this into Google: "free campsites with hiking trails."
There are two better options than finding a place on your own.
1. Go with friends who already have a plan. Especially friends who have experience with this sort of thing.
2. Join the Mountain Blazers on an adventure.
Sign up for a trip with us which meets your level of experience. View our list of trips. On that same page you will find a link to sign up for a trip.

AT Section Hikes v. Loop Hikes
When we go out for an Appalachian Trail (AT) section hike, we hire a shuttle and meet at our end point. The shuttle will pick us up and take us to our starting point. This usually costs about $30 per person. We finish at our vehicles a few days later and drive home.
Shuttle drivers are numerous along the AT in Georgia and North Carolina.
If you are hiking point to point and don't have the luxury of a shuttle, then your other option is to meet at the end point, and then drive one car to the starting point. This means a little extra driving on the last day.
If we aren't on the AT, then we usually try to find a loop hike. It really simplifies the logistics.
Meal Planning & The Bear Bag
For us, these two subjects go together. Most first-time hikers or campers we've met at campsites in the mountains simply did not think about a bear bag. And if they did, they were poorly prepared in their knowledge of how to hang one. The cure for ignoring this comes when a hiker has his or her food stolen and is forced to come off the trail days earlier than scheduled.
Once you've decided how often you are going to cook (this decision might change on each trip you take), meal planning becomes straight forward. We'll use a scenario of a three day, two night adventure. We are starting at around Noon on day one, and finishing around Noon on day three.
1. Pack enough breakfast for two mornings. Maybe it's just breakfast bars. Maybe it includes oatmeal.
2. Pack food for two lunches. Since you are departing around Noon on day one, that lunch can be eaten before it goes into your pack. You might or might not need the lunch on day three. Better safe than sorry.
3. Pack two full dinners.
4. Consider adding a few extra snacks. Not much mind you. Just a few. Food is the 2nd largest contributor to weight.
Helpful Tip. When acquiring bear bag rope make sure it is smooth rope. Some hiking rope is rough and grips itself. This can become a burden if it catches with itself when slinging it high over a tree branch. Most reflective rope would NOT be a good choice for bear bag rope.
Bear Bag Rope
Don't forget to bring rope to hang your bear bag. To make sure you can always reach those high branches, we recommend you carry 50 feet of rope.
Sounds heavy, right?
Thin paracord, 50 feet of it, will do the trick. This can be purchased at Walmart for a reasonable price. It's lightweight and lasts a long time.
Weather
As we get close to a Mountain Blazer excursion we begin watching the weather forecast. In the summer months, what are the chances of thunderstorms? October and beyond, was is the forecast low? Then most of us wonder why we were even checking when we arrive and the conditions are opposite of the forecast.
Predicting the weather in the western North Carolina mountains is an exercise in futility. During the summer months our rule is this; assume it is going to rain super hard. This way we are prepared. Did you know you can get hypothermia in the summer in the mountains? Learn about this with the following article: Hypothermia In The Summer?
For cold weather, the forecast is important and much more likely to be accurate. If there is a forecast of moisture with temperatures below freezing, we usually opt to cancel the trip. This is mostly because we don't want our vehicles stuck on a mountain when we have to be back to work after the weekend.
Rain Coats
Most of us have learned that ponchos simply don't do the job during a heavy down pour. We've gone to lightweight rain coats with a hood. Rain in the mountains, during the summer, is not something to take lightly.

Like most other challenges, hiking and camping in the rain is something you likely won't be comfortable with until you've done it. In your hiking career it is going to happen.
Jerry's article, The Gift Of Rain On The Trail, covers how he has learned to handle rain.
Knowing Your Route
There is a saying among hikers. Hike your own hike. This can apply to many subjects. Here it applies to not becoming bound to your plan.
Planning is important. We will look at a route, make a plan for how many miles to hike each day, and approximately where to camp. But reality does not always match the plan. What if the campsite is too crowded? What if a rainstorm slowed you down and you can't make it as far as hoped?
Here is where the flexibility of backpacking comes in. So what. Camp somewhere else. Stop earlier and find a place to pitch your tent. Don't allow a little thing like a plan going awry to stop you from enjoying your time in the wilderness.
For National and State Parks, be sure to search for any Forest Ranger bulletins. More and more areas are requiring the use of bear canisters. Also, some areas might be deemed unsafe for overnight camping due to bear activity.
Things to consider when planning your backpacking trip
-
Difficulty of the hikes for each day
-
What is the elevation gain?
-
Is the difficulty level appropriate for you and your hiking partners?
-
-
Location of water sources on the trail and at anticipated campsites
-
Find information on current water sources. Draught conditions? Just because it is listed on a map doesn't mean the water is flowing
-
Do your anticipated campsites have water sources?
-
-
Campsite availability
-
Are there park regulations regarding where you can camp? Some places require advance reservations and charge fees
-
If it is first-come, first-serve. Is the destination popular? Will it be difficult to find another campsite if your primary is occupied?
-
-
Potential exit points for situations which require you to shorten your trip
-
Does your trail cross any roads?
-
Are there cross trails which can return you to your vehicles sooner?
-
These are some of the things you should consider as a new backpacker. After you've gained experience your planning will likely become more detailed.
We discuss other items to consider in our section On The Trail
Water Sources
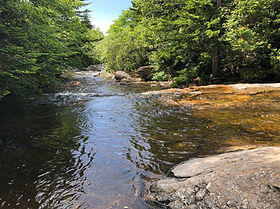
A top priority for us when route planning is the availability of water sources. For some trails, like the Appalachian Trail, water sources are listed (sometimes even on the trail, as pictured below). For other trails, it is important to ensure your map has enough detail to show where streams and rivers are located.
You can't always camp at a water source. When that happens, you need to make sure you are stopping at the closest water source to your anticipated campsite. Also, how far away is the next water source along the trail for the next day.

Safety
Carry a map and a compass and learn from someone how to use both. We cover this further in our section On The Trail.
If possible, do not hike alone deep in the wilderness. Go with a friend or friends.
If you plan to hike alone
Choose a popular route (like the Appalachian Trail)
Provide your intended route to a loved one or close friend, with an anticipated date of return.
Download a GPS tracking app for your smartphone. They operate great in airplane mode. This will allow you to know with certainty if you are still on the trail. GAIA GPS and Guthook are two great apps.
Unless you have graduated from a terrain navigation course, DO NOT ever hike off of a trail. This is also addressed in our section On The Trail.
More on Water Sources
Most of our trips have had campsites with water sources. One trip did not. We hiked 4.5 miles knowing there was no water at the campsite, and the next water source was another 3 miles on the 2nd day. On day 1 we departed with over 3 liters of water each, and ensured our bodies were fully hydrated.
It's possible to camp without a water source, just not preferable.
Water Treatment
There are three ways to make potable water
-
Boiling
-
Purification Tablets
-
Filters
Boiling Water. If you plan to eat freeze dried meals, or have hot beverages like coffee, then you will need to boil water. This water can be straight from a source like a stream, with no further treatment required. You will probably find that boiling your water for use as drinking water to be tedious, time consuming, and uses more propane than you may want to carry.
Purification Tablets. This is an effective way to treat water. It takes about 30 minutes, but large quantities can be treated at once (like an internal water bladder). The downside is the metallic taste this creates. Most packages come with PA neutralizing tablets to remove the metallic taste.
Water Filters. This is far and away the most popular method to treat water among backpackers. Water filter technology has come a long way. It is now a quick and effective way to make large quantities of potable water.
Due to the variety of water filters on the market, we recommend you consider starting with purification tablets. Watch what other hikers use for water filters and then make a decision.
Time to Weigh your Backpack?
How much is too much?
Place this topic on a backpacking forum and watch the answers accumulate. If you've been searching the Internet to learn about backpacking, you've likely come across more than one article about lightweight backpacking. It is probably the number one topic these days. Many backpackers love to consider themselves ultra lightweight backpackers.
The nominal weight for a backpack is a very individual thing. And it is something which simply takes experience before you determine what that weight should be. Read Jerry's trip report from his 2015 AT section hike where he briefly discusses his backpack weight.
To attain the category of ultra lightweight you are going to have to spend money. However, there are strategies to reduce your weight without spending $500 for a backpacking tent.
-
How many sets of clothes do you really need? Did you glance over our advice on this in our Backpacking Gear section?
-
A pillow. Some hikers bring an inflatable pillow. Others have a pillow case, which they stuff with the clothes they aren't wearing while sleeping.
-
Carefully pack the food you need, discussed in this section. While we recommend packing a little extra, be careful not to take too much.
-
Do you really need to bring that large hunting knife?
In the end, it will take a few trips to determine what you really need. Most backpackers apply the following rule: If it has been in your backpack for 3 straight trips and has not been used, it can probably stay home.
Note: Not applicable to first aid kits
Pack and Repack
You should weigh your backpack at home numerous times, assuming you have a scale. Warning! Math will be required.
Stand on the scale without your backpack. Record your weight. Stand on the scale with your backpack (fully loaded). Record the weight. The difference between the two is your backpack weight.
Remove some items, and then repack.
Doing this multiple times has an additional benefit. You begin to learn where you keep everything. You will develop a packing system, which will not only force you to learn where everything is located, it also has the benefit of reducing the chance you will leave something at a campsite.
When you've developed a routine for packing, and you can't find your headlamp (it was time to pack the compartment where you place the headlamp), you are going to stop and search for your headlamp.
If you pack without some sort of sequence, then you may not notice the missing headlamp until your next campsite.